Showing posts with label recipes. Show all posts

March 31, 2012

Chocolate Chip Cookie Dough Cupcakes


I found this treasure of a recipe via pinterest and have saved it up for when I had the energy to complete it all at once. As I was also warned, let me tell you that this is not a recipe for the weak- it is not a cookie dough battle, but instead, a war. A fabulously delicious, totally worth it war; a war that you feel good about when it's over. Borrowed  and adapted from The Girl Who Ate Everything Blog, who borrowed it from Annie's Eats.. here we go!

Here's what you'll need:

For the cupcakes:
3 sticks unsalted butter (1 1/2 cups), at room temperature
1½ cups light brown sugar
4 large eggs
2 2/3 cups all-purpose flour
1 teaspoon baking powder
1 teaspoon baking soda
¼ teaspoon salt
1 cup milk
2 teaspoons vanilla extract
1 cup semisweet chocolate chips

For the filling:
4 Tablespoons (1/4 cup) unsalted butter, at room temperature
6 Tablespoons light brown sugar
1 cup plus 2 Tablespoons all-purpose flour
7 ounces sweetened condensed milk
½ teaspoon vanilla extract
¼ cup mini semisweet chocolate chips

For the frosting:
3 sticks unsalted butter (1 1/2 cups), at room temperature
¾ cup light brown sugar, packed
3½ cups confectioners’ sugar (powdered sugar)
1 cup all-purpose flour
¾ teaspoon salt
3 Tablespoons milk
2½ teaspoons vanilla extract

For decoration:
Mini chocolate chips


For decoration:Mini chocolate chips

Directions:

Preheat the oven to 350° degrees. Line cupcake pan with liners. Although it approximated 24 cupcakes, I was able to make 30.

In the bowl of a stand mixer fitted with the paddle attachment, combine the butter and brown sugar. Beat together on medium-high speed until light and fluffy, about 3 minutes. Mix in the eggs one at a time, beating well after each addition and scraping down the sides of the bowl as needed.

Combine the flour, baking powder, baking soda, and salt in a medium bowl. Stir together to blend. Add the dry ingredients to the mixer bowl on low speed, alternating with the milk, beginning and ending with the dry ingredients, mixing each addition just until incorporated. Blend in the vanilla. Fold in the chocolate chips with a spatula.

Divide the batter evenly between the prepared cupcake liners. Bake for 18-20 minutes, until a toothpick inserted in the center comes out clean. Allow to cool in the pan 5-10 minutes, then transfer to a wire rack to cool completely.

To make the cookie dough filling, combine the butter and sugar in a mixing bowl and cream on medium-high speed until light and fluffy, about 2 minutes. Beat in the flour, sweetened condensed milk and vanilla until incorporated and smooth. Stir in the chocolate chips. Cover with plastic wrap and refrigerate until the mixture has firmed up just barely.To fill the cupcakes, cut a cone-shaped portion out of the center of each cupcake. I used the tip of a steak knife but I've also been told that there are specific kitchen gadgets for this very purpose, who knew?! I used a stiff pastry bag with a very wide tip, or if needed you can remove the tip (sometimes the chocolate chips get jammed in there). Fill each hole with a chunk of the chilled cookie dough mixture. It may come up and overflow a bit onto the top of the cupcake but don't worry, the icing will do a great job of covering it.

To make the frosting, beat together the butter and brown sugar in the bowl of a stand mixer fitted with the paddle attachment until creamy. Mix in the confectioners’ sugar until smooth. Beat in the flour and salt. Mix in the milk and vanilla extract until smooth and well blended.

I used a disposable pastry bag for piping the icing and it worked like a charm! Sprinkle with mini chocolate chips to finish.


Look at this cupcake in all its glory! I hate myself for not taking a picture of the cupcake cut in half so you could see the amazing inside, the perfect amount of cookie dough! Run on over to The Girl Who Ate Everything and check it out!


March 26, 2012

Eat it All Week Chicken Salad

When you know your week will be crazy busy and there's no time to cook every meal, here's a super yummy and really easy chicken salad recipe that you can turn to. Not to mention it's full of fresh fruit and veggies and will get you ready for spring .


Quite possibly the very best part of chicken salad is that you can't mess it up- put as much of each ingredient you want, add different things or leave some out!

Here's what I used:

2 large cans canned chicken breast, drained and shredded
1/2 yellow onion, minced
1/4 cup sweet relish
1/2-3/4 apple, diced
purple grapes, halved or diced
2 stalks celery, diced
Duke's Mayo, to taste
Salt & pepper, to taste


Mix it together really well and refrigerate.


Serve on toasted bread or with crackers! Hello Spring!


March 11, 2012

Homemade Rice Krispy Treats


Delicious! One of my very favorite treats for years, and I've just now made them myself. And I never knew they could be so easy- it will definitely be a go-to dessert from now on.

Here's what you need:

1 stick of butter
11 1/5 cups of Rice Krispys Cereal (almost a whole box)
16 oz of mini marshmallows
9x13" or larger glass pan
wax paper

Here's what you do:

1. Melt the stick of butter in a large pot on Medium-low heat. Melt it slowly, slowly!
2. Add the marshmallows and stir, still on medium-low heat. Melt them slowly as well, stirring occasionally.
3. When fully melted, add the rice krispy cereal and stir to combine.
4. Grease your pan. Pour mixture into pan and use wax paper to press krispys down firmly (because they're super sticky).
5. Let stand until cool (about an hour). Cut and serve.

March 10, 2012

Date Night Dinner: Shrimp & Grits with Sausage

There's nothing like having a plan.. After all, there's nothing I love more than a plan. But there's also nothing worse than when you have a plan and then it fails.. miserably, all week. Well, almost all week. To break it down, here was my plan: make delicious dinners several nights this week, and blog about the success, and share the recipes. After a slow cooker beef stroganoff recipe disaster (cheap beef jerky flavor, anyone?), and a "entree turned side dish and now we have nothing to eat tonight".. I was left with nothing to post.

THEN in all my disappointment, I turned to a great food blog, Seasoned To Taste, and found this treasure! An absolute masterpiece of a dinner, perfect for date night! My only challenge remaining: don't ruin the grits! (I've attempted another version of shrimp and grits, only with bacon instead of sausage, and it wasn't a success to say the least. Bryce will gladly try most of my recipe attempts, but that particular night was a struggle)


This is gorgeous and so fresh. I'm in love. I chopped the veggies the night before, and sealed them up until time to cook.


We also had the most awesome salad.
(Mostly to make up for the gazillion calories we were about to consume)


Run over to Seasoned To Taste and get this recipe! You'll be so glad you did! I doubled the recipe to accommodate for the number of friends we had over.


 Lastly, I have a confession: I did not ruin the grits, because I did not make the grits. My lovely friend Amanda did. I couldn't take the chance on ruining dinner for 6 other people.. (We used instant grits though and they work great.)


We had homemade Rice Krispy Treats for dessert! Stay tuned for the recipe!


February 19, 2012

Girls' Night Veggie Stir Fry

(Thanks to my best friend, Abigail for sharing her recipe!)

 Here it is- easy, healthy, and so yummy! It's virtually guilt-free so you can have that one extra glass of wine, or two. Of course fresh veggies are tastier and more nutritious but you can also make this with frozen vegetables if that's what you have on hand.

Here's what you need:

1 red bell pepper, chopped
Broccoli, chopped
1 carrot, chopped
1 bag snap peas
Mushrooms, chopped
1 small can water chestnuts (optional)
1-2 packets Simply Asian General Tso's (found on the international aisle)
Brown Rice (I used boil-in-a-bag instant)


Here's what you do:

Heat roughly a tablespoon of EVOO in your skillet over medium heat. In the meantime, cut up your veggies. Throw them in the pan, add 1/4 cup of water and saute. Add Simply Asian sauce and stir. Cook to desired veggie softness. Season with salt and pepper.

Boil water on the stove. Once boiling, add your rice and cook as box instructs.


Now plate it. And eat it, while drinking wine with your best girl friends! Yum!

(Not a great picture, but you get the idea)

February 7, 2012

Super Bowl Food Frenzy

As promised, I'm sharing the recipes I used for our Super Bowl party. May I recommend starting early and accepting help in the kitchen if you plan to make this entire spread for a single event. I was lucky enough to have lots of help, and still finished, literally at kick off.


Slow Cooker Shredded BBQ
Courtesy of Bryce


1 boston butt
McCormick dry rub
1 cup apple cider vinegar
1/2 cup water
1 tablespoon liquid smoke
*Note these measurements are approximate and can be adjusted for what you like!

1. Cover your meat in dry rub.
2. Place it in your crock pot and add the vinegar, water, and liquid smoke.
3. Cook on low for 8 hours.
4. Remove from crock pot and allow to cool long enough you won't burn yourself then start shredding! Serve warm with the sauce you love most, or try your hand in making your own.. if I told you our sauce recipe, I'd have to kill you!


Cheesy Pigs in a Blanket


Refrigerated cans crescent rolls
Little smokies
American cheese

1. Preheat your oven to 400 degrees. Grease your cookie sheets, even when using foil.
2. Cut your crescent rolls into two pieces each, creating two smaller triangles
3. Place a piece of cheese on each newly formed triangle.
4. Roll the little smokie up into the cheese and crescent roll.
5. Tuck the end in, and lay it down on the cookie sheet, with the end on the bottom so it doesn't come unrolled.
6. Bake as instructed on the crescent roll can, roughly 11-12 minutes.

You can see when I got busy and accidentally left a cookie sheet of pigs in the oven too long. Oops! Good news is, they don't burn easily so they were still really yummy! Mustard is a favorite for dipping!


Chocolate Heath Bar Trifle
(This is a GREAT dessert to make ahead!)


1 box chocolate fudge cake mix
(oil and eggs as needed in most cake mixes)
2 boxes instant chocolate pudding
milk
1 cup strong brewed coffee
cool whip
heath candy bar, crushed

1. Bake the cake as box indicates. Allow to cool fully. Crumble.
2. Mix chocolate pudding as package indicates. Set aside.
3. Reserve about a cup of crumbled cake for the very top. Divide in half the remaining crumbles. Put one half in the bottom of your trifle or bowl. Pour half your brewed coffee into the cake.
4. Add half the chocolate pudding, layering it over the cake crumbles.
5. Add half the cool whip.
6. Sprinkle crushed candy bars over the cool whip.
7. Repeat with all layers, ending with heath bar on the very top.
8. Refrigerate for at least two hours to chill.


Fruit Salad with Cinnamon Sugar Chips


1 pack tortillas
butter cooking spray
 1 tsp cinnamon
 1 cup sugar
1 lb strawberries
blueberries
2 golden delicious apples
2 kiwis
1 tablespoon brown sugar
2 tablespoons fruit preserves (I used Strawberry Jelly)

1. Peel and cut up all your fruit.
2. Add fruit preserves and brown sugar and and mix up. Refrigerate for 2 hours to chill.
3. In the meantime, cut your tortillas into slices.
4. Mix your cinnamon and sugar in a bowl. Add as much cinnamon as you like.
5. Lay on cooking sheet and spray with butter cooking spray. Flip over and spray other side as well. Dip your buttered slices into the cinnamon- sugar mixture.
6. Return each to the cookie sheet and bake/toast in your oven until lightly browned. (350 degrees, 10ish minutes)
Serve! Delish!


Here are two additional recipes I used, which were wonderful:

(Note: By experience I learned not to hit a button on the blender and walk away. Use the "pulse" button to avoid a completely liquid salsa ;) )

So so good! Now my favorite Guac recipe! It's a must- try!


February 3, 2012

Peacock Lamp & Pecan Crusted Mozzarella Salad

Hellooo and Happy Friday!! Spending today finishing up the trim work in the house, cleaning like a crazy person, baking, and maybe there will be time for a little shopping? In the meantime, I hope you enjoy this Goodwill find turned trendy peacock lamp, transformed with love, fabric, and hot glue.

Before...$8 at Goodwill


 The awesome fabric I found at JoAnn's..$6.99 per yard (only takes about 1/2 a yd though)


Use the method shown here..

..and it's as cute as a button!


All for about $11.50! Works like a charm and no one will have the same lamp you have!


While you're admiring your new lamp, whip up this salad and enjoy- it's amazing!

This recipe comes from the Pampered Chef and is absolutely yummy!


Pecan-Crusted Mozzarella Salad
(SO good with balsamic dressing)


Ingredients:
1/2 cup finely chopped pecans
2 tbsp shredded Parmesan cheese
8oz log of mozzarella cheese
1 tbsp all-purpose flour
1 egg, beaten
1/3 cup bread crumbs
Extra virgin olive oil
Everything you love in a salad

Here's what you do:

1. Slice mozzarella into 8 rounds, about 1/2 inch thick each.
2. Put the flour in one bowl and the beaten egg in another bowl.
3. Combine pecans, Parmesan cheese, and bread crumbs in a third bowl.
4. Lightly coat each slice of mozzarella in flour. Then shake off the extra. Dip it into the egg and then into the pecan mixture. Make sure it's all covered.
5. Heat your skillet to medium heat and add oil.
6. Add mozzarella and cook over medium heat 1-3 minutes, or until simmering. Flip and cook the other side, making sure both sides are brown.
6. Remove from heat and add to the top of your salad.


January 23, 2012

DIY Picture Frame & Slow Cooker Chicken Tacos

Here's a DIY double whammy for ya- make a fabric picture frame and cook dinner at the same time! (except one will take about 5 1/2 hours longer than the other.)

Cute right? And if you make it in the same fabric you made your lamp (here), it will help tie everything in your room together. And your friends will think "oh wow she's crafty!"

So here's what you do..

Pick out an old frame, frame you've had forever, that you got as a gift, one that you never really liked, or whichever one, and lay your fabric over it. Make sure you have enough fabric to cover the top and a little bit of either side.

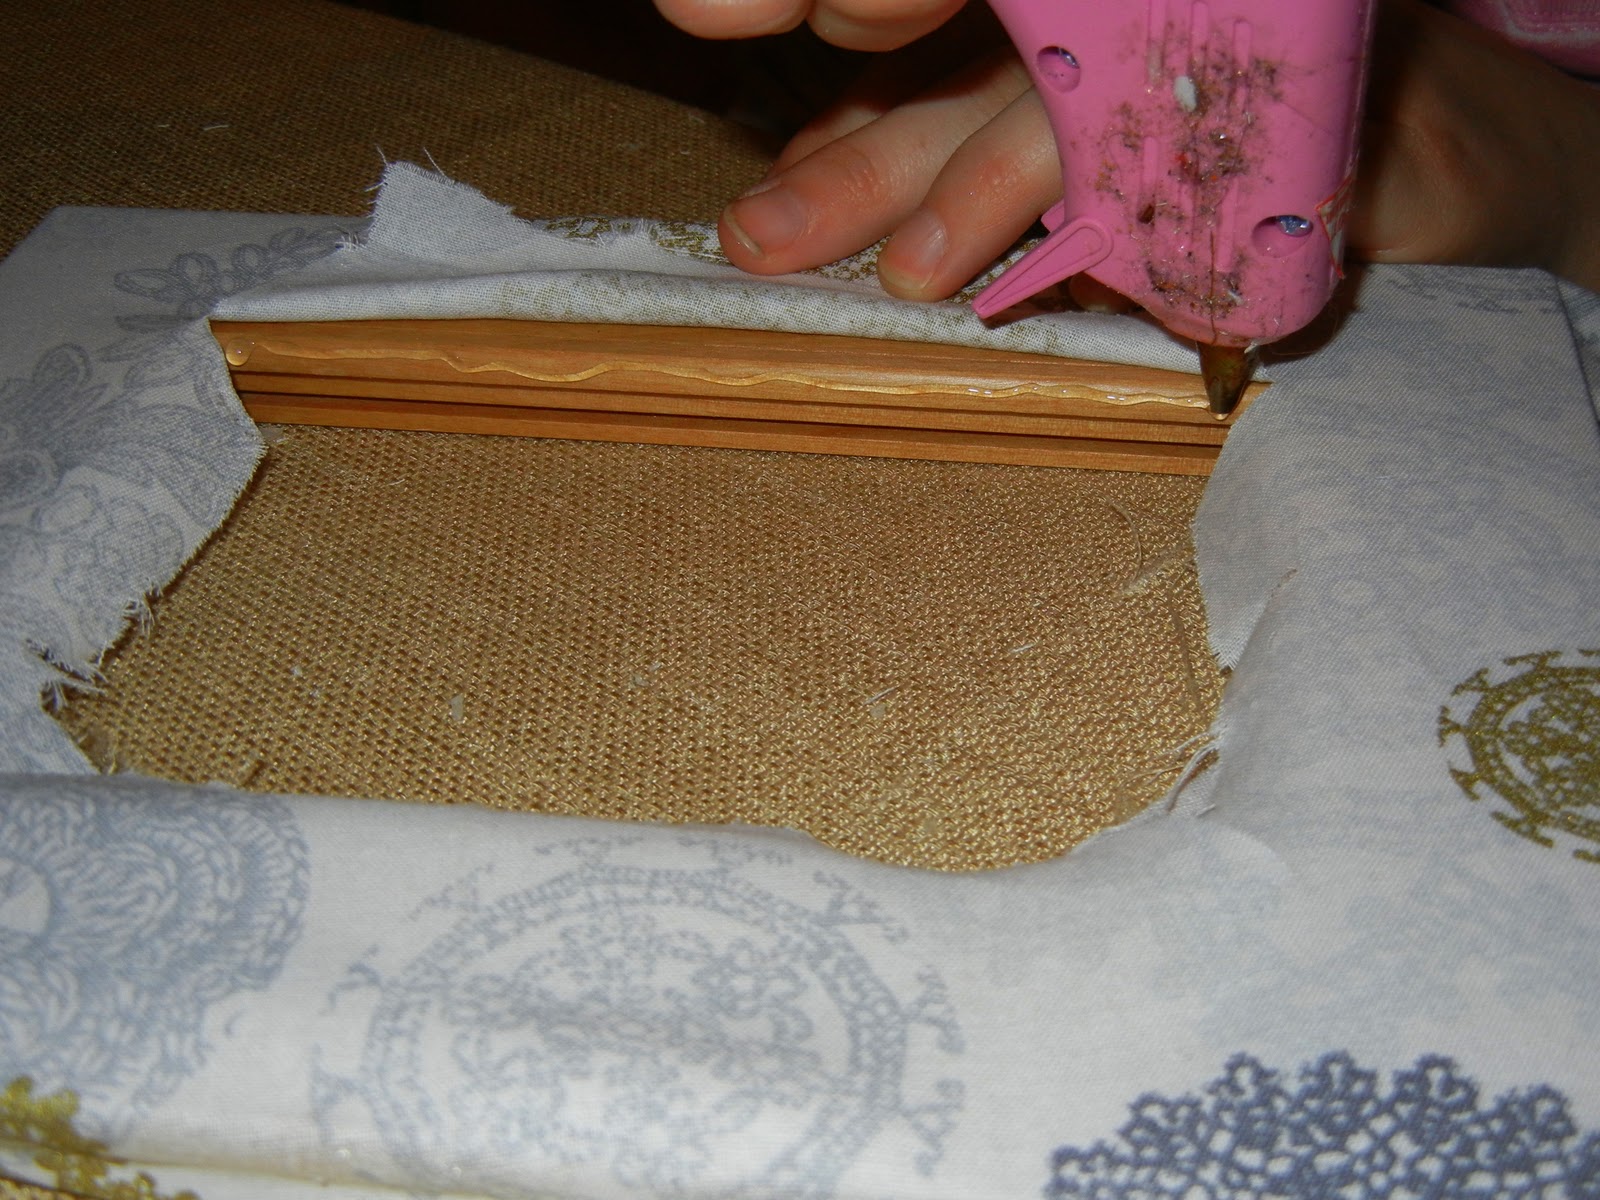
Remove the glass. Pull the fabric tight, and hot glue it down starting on the outside of the frame. Like this..


Then use an X-acto knife to cut out the middle, remembering to leave enough to tuck under. You'll also need to cut really close into the corners so that the fabric tucks correctly.


Then glue the insides. Keep it taunt.


Waaa laa! Easy! (and cute)


I put mine on my new shelf!
(Yes this is a corner shelf.) 
(Yes, it's made from a door.)
(Yes, my dad made it.)
(Yes, he's the best dad ever!)
(Yes, I love it, and him.)


Now for the dinner part.. Slow Cooker Chicken Tacos


So stinkin' easy!

3 chicken breasts
1 jar of salsa
1 packet taco seasoning (but I only used half)
Toppings

Dump it all in and stir! Cook it about 6 hours on low. Shred it with a fork.


Put that baby on a tortilla. Add lettuce, tomatoes, sour cream, cheese, whatever you love.

Enjoy!


January 15, 2012

Boston Cream Whoopie Pies


I've been cooking and baking new things a LOT lately, I guess because it's been FREEZING outside and I sometimes lack crafting motivation when it's cold. So what do I do instead? Bake, and eat! Trust me though, this is the greatest recipe, and you'll thank me (and Annie's Eats) for sharing this with you!

Here's what you'll need:

For the pastry cream:2 cups half-and-half
½ cup sugar, divided
Pinch salt
5 large egg yolks
3 tbsp. cornstarch
4 tbsp. cold unsalted butter, cut into 4 pieces
1½ tsp. vanilla extract

For the cookies:8 tbsp. unsalted butter, at room temperature
¾ cup sugar
2 tsp. vanilla extract
2 large eggs
2¼ cups all-purpose flour
1½ tsp. baking powder
¾ tsp. salt
½ cup milk

For the ganache:2 oz. bittersweet chocolate, finely chopped
¼ cup heavy cream

Here's how you do it:


To make the pastry cream, heat the half-and-half, 6 tablespoons of the sugar, and the salt in a saucepan over medium-high heat until simmering, stirring occasionally to dissolve the sugar.  Meanwhile, combine the egg yolks and remaining 2 tablespoons sugar in a medium bowl and whisk until the sugar has begun to dissolve and the mixture is creamy, about 15 seconds.  Whisk in the cornstarch until combined and the mixture is pale yellow and thick, about 30 seconds.


When the half-and-half mixture has reached a simmer, slowly add it to the egg yolk mixture to temper, whisking constantly.  Return the mixture to the saucepan, scraping the bowl with a rubber spatula.  Return the mixture to a simmer over medium heat, whisking constantly, until a few bubbles burst on the surface and the mixture is thickened and glossy, about 30 seconds.  Off the heat, whisk in the butter and vanilla.  Strain the pastry cream through a  fine mesh sieve set over a medium bowl.  Press plastic wrap directly on the surface to prevent a skin from forming and refrigerate until cold and set, at least 3 hours and up to 2 days.
To make the cookies, preheat the oven to 375˚ F.  Line two baking sheets with parchment paper or silicone baking mats.  Fit a pastry bag with a wide round tip. Combine the butter and sugar in the bowl of an electric mixer and beat on medium-high speed until light and fluffy, about 2 minutes.  Blend in the eggs one at a time, beating well after each addition.  Blend in the vanilla.  In a medium bowl combine the flour, baking powder, and salt; whisk to combine.  With the mixer on low speed, add the dry ingredients to the bowl, alternating with with the milk, and beating each addition just until incorporated.

( why yes, that is a snowman spatula. Jealous?)


Transfer the batter to the piping bag.  Pipe 1½-2 inch circles onto the prepared baking sheets, spacing an inch or two apart.


 Bake 8-10 minutes, until the cookies are set (they should not brown.)  Transfer to a wire rack to cool completely.  Repeat with any remaining batter as necessary.


Once all the cookies have cooled, match them up in pairs by size.

To make the ganache, place the chopped chocolate into a small heatproof bowl.  Bring the heavy cream to a simmer in a small saucepan.  Pour the cream over the chocolate and let sit for 1-2 minutes.


 Whisk in small circular motions until the chocolate is completely blended and the ganache is smooth.  Dip the rounded side of one cookie of each pair into the ganache and coat with an even layer.  Return to the cooling rack, flat side down, and let the ganache set before proceeding. (By the way, dipping cookies in ganache is NO JOKE! Didn't turn out so pretty for me- but, they tasted like heaven!)


Transfer the pastry cream another piping bag fitted with a smaller plain round tip.  Pipe a dollop of pastry cream onto the flat side of the plain cookie of each pair.  Press the flat side of the other cookie to the pastry cream, sandwiching the two together.
Keep refrigerated in an airtight container for up to 2 days.


Thanks To Annie's Eats for sharing this awesome recipe! I absolutely loved the challenge, and loved the taste even more! Hope you try them and enjoy!