Showing posts with label crafts. Show all posts

February 28, 2012

Fabric Covered Bulletin Board


Alright people, I'm call this try-it Tuesday.. not sure it will stick, but go with it. A fabric covered bulletin board, simple enough, right?

 I made mine for my kitchen, but it would be great in an office, or child's bedroom, dorm room, classroom, etc. Think about it.. it could practically work for anyone.

(Forgive my bad photography- the picture is crooked, not the board)


 It's really easy- choose some awesome fabric (one yard is all I needed), get an already existing cork/bulletin board, and use a staple gun to secure the fabric. Make sure to pull it tight! Cut any excess fabric.


So try it!  Pin it! Share it! Let me know how it goes!


January 23, 2012

DIY Picture Frame & Slow Cooker Chicken Tacos

Here's a DIY double whammy for ya- make a fabric picture frame and cook dinner at the same time! (except one will take about 5 1/2 hours longer than the other.)

Cute right? And if you make it in the same fabric you made your lamp (here), it will help tie everything in your room together. And your friends will think "oh wow she's crafty!"

So here's what you do..

Pick out an old frame, frame you've had forever, that you got as a gift, one that you never really liked, or whichever one, and lay your fabric over it. Make sure you have enough fabric to cover the top and a little bit of either side.

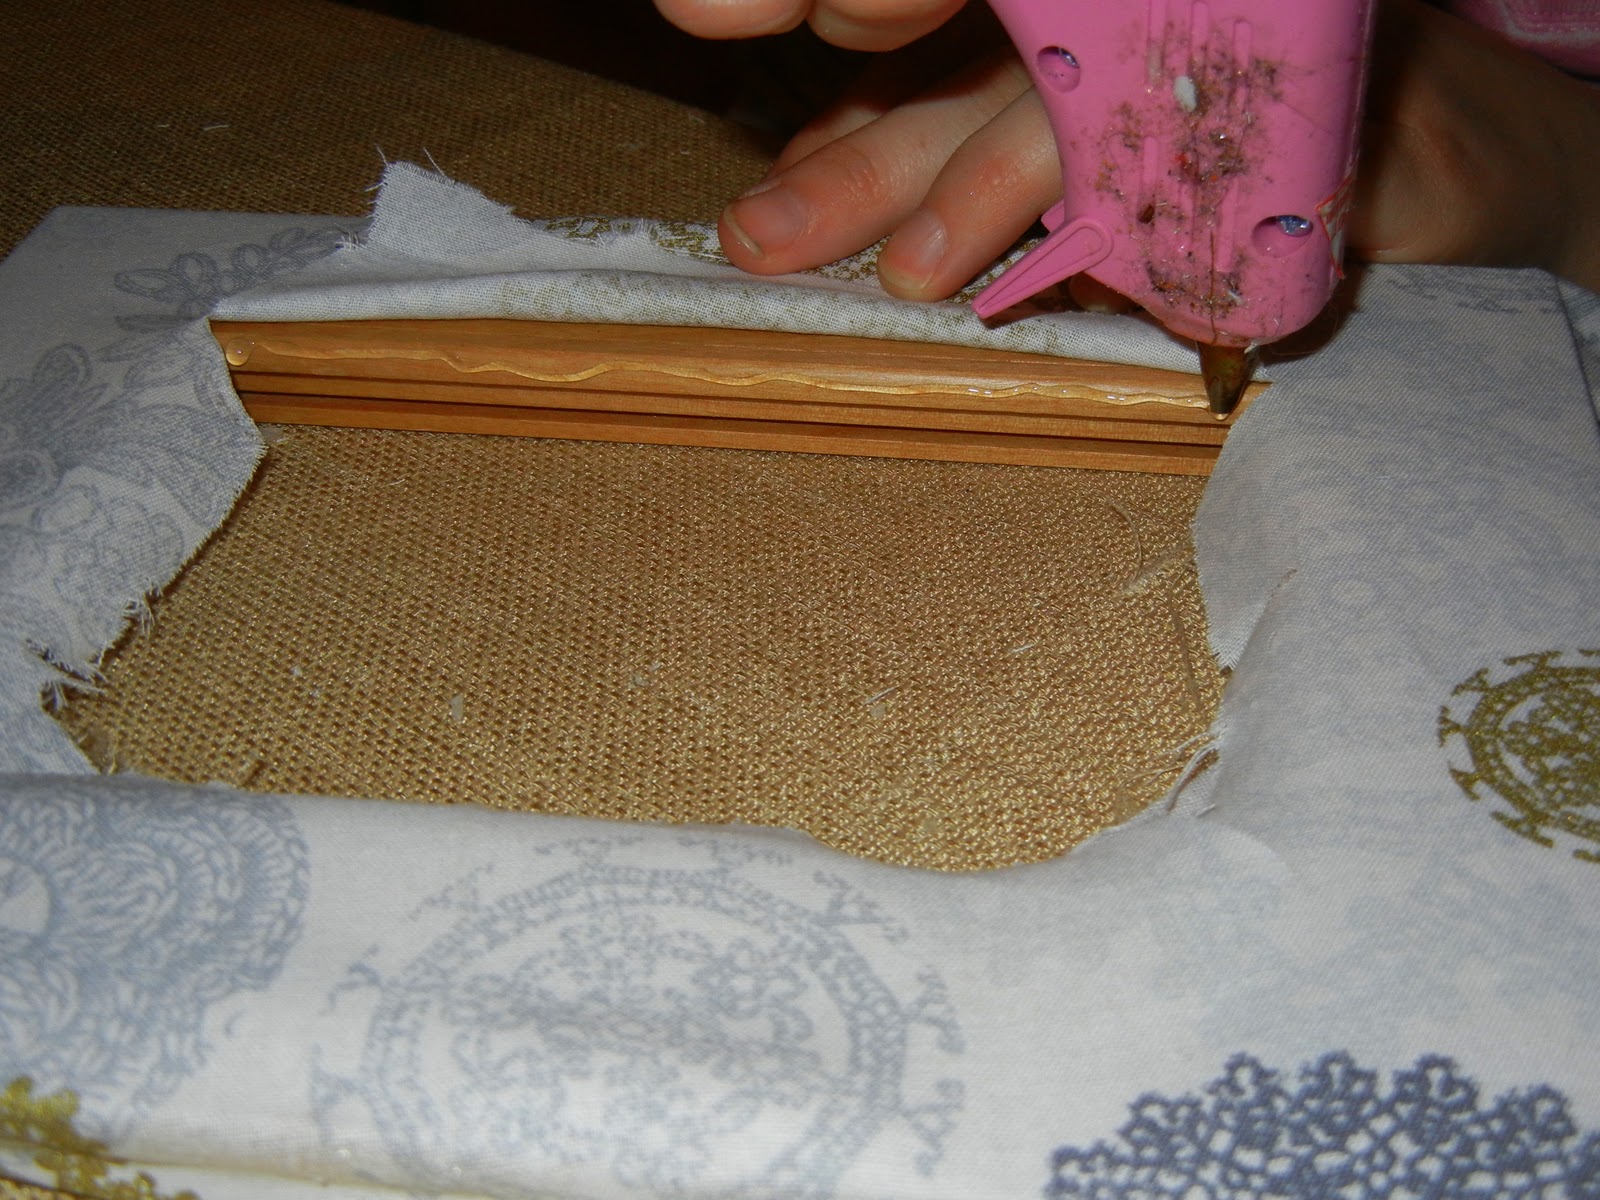
Remove the glass. Pull the fabric tight, and hot glue it down starting on the outside of the frame. Like this..


Then use an X-acto knife to cut out the middle, remembering to leave enough to tuck under. You'll also need to cut really close into the corners so that the fabric tucks correctly.


Then glue the insides. Keep it taunt.


Waaa laa! Easy! (and cute)


I put mine on my new shelf!
(Yes this is a corner shelf.) 
(Yes, it's made from a door.)
(Yes, my dad made it.)
(Yes, he's the best dad ever!)
(Yes, I love it, and him.)


Now for the dinner part.. Slow Cooker Chicken Tacos


So stinkin' easy!

3 chicken breasts
1 jar of salsa
1 packet taco seasoning (but I only used half)
Toppings

Dump it all in and stir! Cook it about 6 hours on low. Shred it with a fork.


Put that baby on a tortilla. Add lettuce, tomatoes, sour cream, cheese, whatever you love.

Enjoy!


December 4, 2011

DIY No-Sew Pacifier Clips

At an age when I feel like everyone I know is either getting married or having a baby, I try to get creative with gift giving. Here's a sure fire craft project that will give your baby gift a personal touch!

DIY No-Sew Pacificer Clips


What you'll need:
Ribbon (1 inch wide), Zelcro roll (self-stick back if desired, 1 inch thick), Hot glue,
 Suspender/Pacifier/Mitten clips, Scissors


Trim your ribbon to the desired length. Keep in mind you'll be folding it over.


Turn your ribbon over, and fold the end under. Hot glue it down. Do this to both sides.


Cut a small square of velcro, peel back the adhesive paper, and add hot glue. Apply one part of the velcro to the ribbon, slightly overlapping the end you tucked/glued.

This is your "pacifier side". Add the matching piece of velcro farther down on the ribbon, allowing enough distance that you could string the ribbon through the pacifier and still velcro it closed. (these instructions are confusing so see pictures below for help!)


Here's a side view to help you judge how much space to leave between velcro pieces.


You'll do these same steps to attach velcro on the opposite end of the ribbon. Since this is your metal clip side, you won't need to space the two pieces of velcro apart as much.

pacifier Clip

Add your clip.


Done!

Here's a basket I created for Baby Maddox, and incorporated the clips!


Let me know if you have any questions!


November 28, 2011

DIY Winter Wine Bottles


There's no sense in throwing away your empty wine bottles this fall if you can make fun decorations with them!

Here's what you'll need:
Empty wine bottles, white spray paint, tree branches from the yard, silver branches,
glitter spray, adhesive spray, rock salt


Start by collecting several wine bottles. Soak the labels off in the sink or bathtub.
Put down some newspaper and prepare to spray paint!


Coat the bottle evenly with white spray paint, careful not to cause dipping. Let dry.


Here are the four bottles I painted. Notice there are two taller, and two shorter-- I did that on purpose :) Apply a second coat if needed!


On separate newspaper, lay your branches down and spray them with glitter spray. Let dry, turn over and coat opposite side. You could also dust them with the white paint to make them appear "snowy"- it's totally up to you!


Once your bottles are dry, spray the lower portion of each with adhesive spray. Then sprinkle with rock salt to create an iced look. To finish, lightly spray glitter spray over the entire bottle.


Yep, took this straight out of the kitchen!


So easy, but so cool!

When your branches are dry (doesn't take long at all), combine them and the silver branches
 to fill each bottle


A pair on your mantle/hall table/some kind of black surface looks pretty sharp! Feel free to add a bow!


November 23, 2011

All That Glitters..

On this Thanksgiving eve, I want to share with you some DIY decorated champagne glasses that are sure to make your holiday season a little brighter-- and a little more GLITTERY! Because this project is super easy and inexpensive, you can make them for holiday parties, bachelorette parties, special events, birthdays, etc. AND- depending on the paint brush you use, you can even personalize them with a monogram or design.

WHO WOULDN'T WANT TO DRINK OUT OF THIS?


So.. here's what you'll need:

Champagne Glasses (set of 4 at Walmart, $5), Glitter (about $3 at Michaels Craft Store), Craft Glue,
Foam Paint Brush (Less than $1), painter's tape (optional)


(I thought it was a excellent sign that the brand name was Libbey)

Squeeze some glue into a bowl, and add just a little water. Stir it up with a spoon or your finger. The consistency should be barely watery. (A little bit goes a long way)..and by the way, this is Modge Podge so don't buy it it in the store- glue and water are just as good.


One design (for those who like/are good at creating straight lines) add painter's tape to the
 top of the wine glass. Like so:


Lightly dip your foam brush in the glue (don't get crazy, you don't need a lot), and while holding the glass with one hand, paint up the side with glue. you can make a pattern or paint the whole thing, just don't paint the stem (people will need something to hold on to)


Add glitter!


(I used gold glitter until I got towards the top and then I added red and blue)

Wait until it dries and remove the tape. Shake off the extra glitter. Waah Laa!


On the next one, I wanted less of a straight line and more of a faded-type look.


Happy Thanksgiving Ya'll!
CHEERS!

November 20, 2011

Christmas Bulb Wreath!


There's nothing better during the holidays than a good wreath!


I originally set out to create a holiday bulb wreath that would be silver, white, and blue... but when I couldn't find the colors I wanted, sizes I needed, or they were too expensive for a trial project, I defaulted to traditional Christmas colors with a twist- textured, solids, patterned, etc. (finally found bulbs at The Christmas Tree Shop.. imagine that)

Here's what you'll need:
wreath form (you can make your own, see below!)
Ribbon
Scissors
Hot glue (of course!)
Shatterproof Christmas Bulbs in 3 sizes

(I quickly decided against using yellow ribbon, and opted for green and red instead)

First things first-- Hot glue one end of your ribbon to the wreath form and begin wrapping around, covering the form entirely. Glue the ribbon down in several places. This will serve as your "canvas" and will be mostly covered so don't worry if it's not perfect. You can use two different colors if needed, but keep in mind it will show through in some places.
(Save yourself money by using ribbon that is wireless)


 See! Far from perfect, doesn't matter!


Now- pull all the hangers out of the bulbs


Start with your largest size bulbs and glue them on the wreath form so that they're spaced evenly. Then begin gluing the "medium" size bulbs onto the form. Be sure to alternate colors, patterns, etc. as you go around. You'll complete the wreath by adding the smallest size (I actually cut apart Christmas bulb-shaped garland for these pieces because I couldn't find small enough bulbs.) If you need some visuals, check out this blog!


Once you get gluing it will look something like this. (Sometimes you can see the dried hot glue on some bulbs, but don't worry-- when it's hanging, no one will ever know!) And depending on the bulbs you choose, there may be glitter EVERYWHERE by the time you're finished!


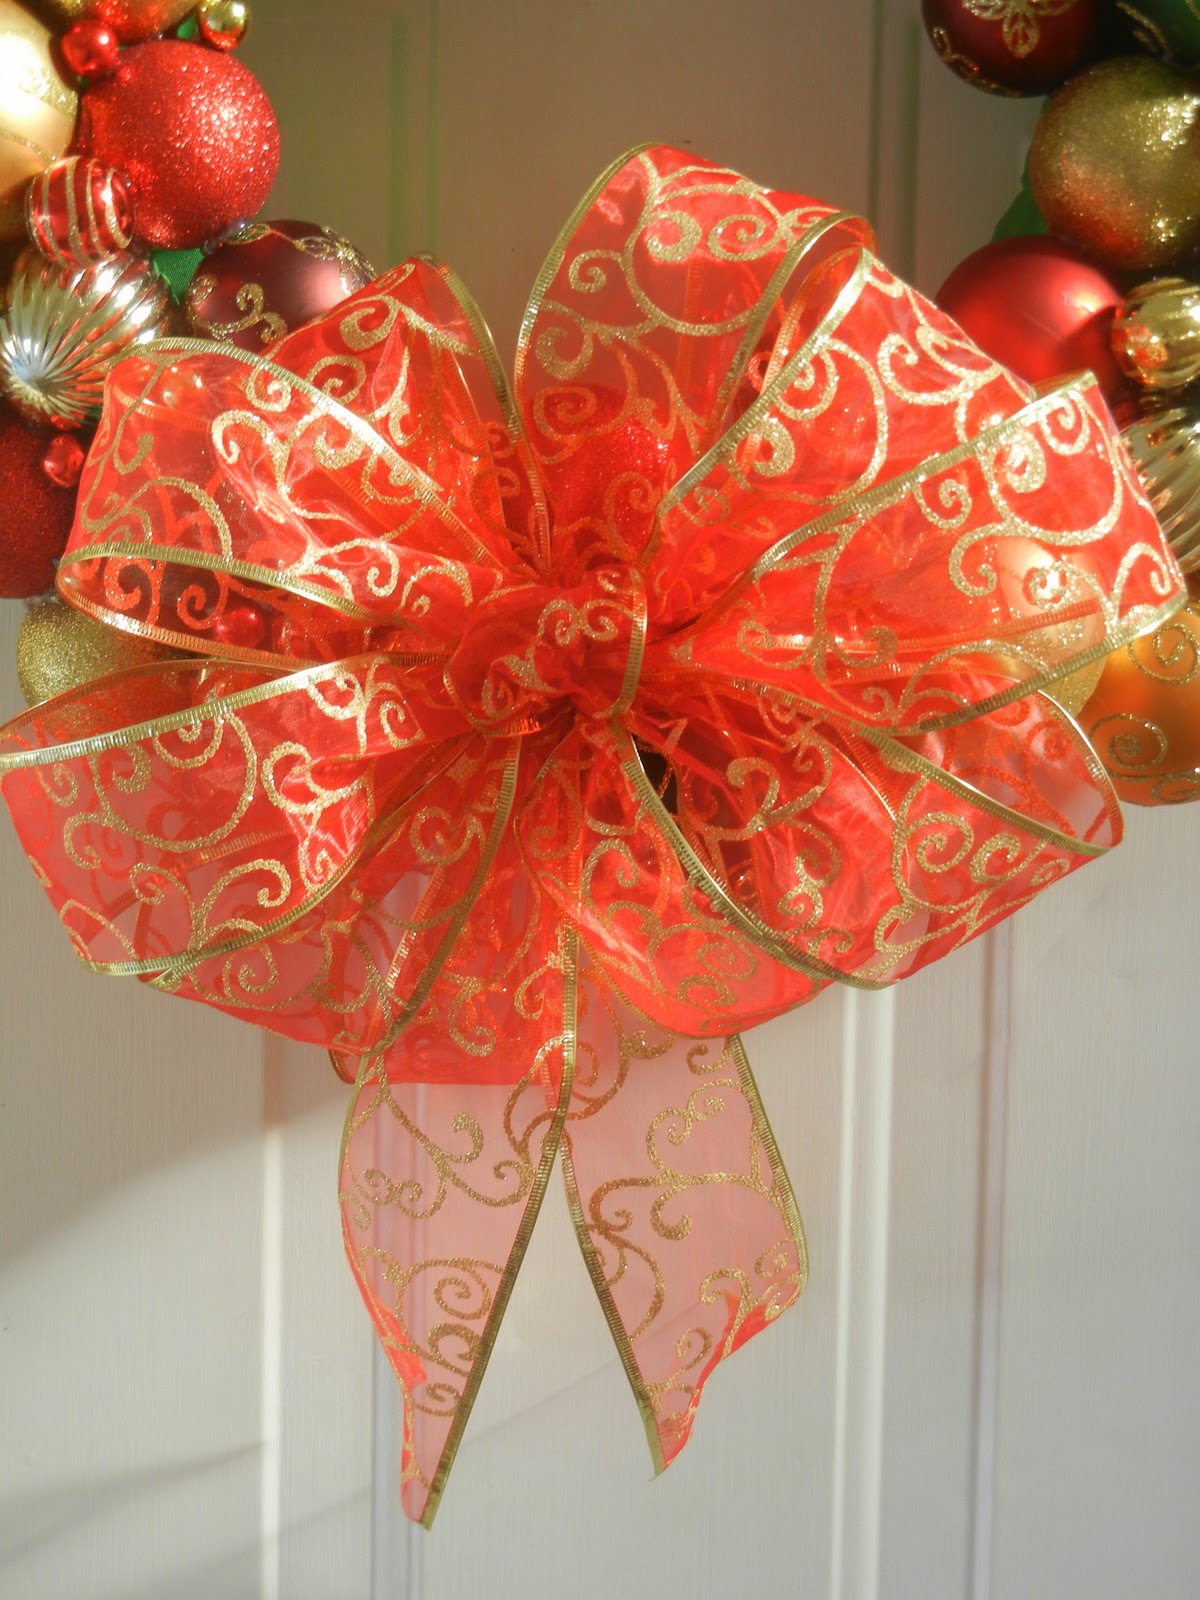
It turned out pretty good! Notice the two holes at the bottom? Yep, I ran out of bulbs- ONLY TWO SHORT! how annoying! But never fear, I'm adding a BOW! (image that!?) Stay tuned to see the finale when I find the very perfect Red/Gold ribbon!


A few tips for creating/hanging wreaths:

To create your own wreath form, you can buy a swim noodle and cut it to the size you want, curve it into a circle and secure it with duck tape. Easy breezy!

To hang a wreath, you can stick a 3M hook upside down on the back of your door and attach a ribbon to it, taking it up and over the door. See HERE for a picture and some other great ideas!

I've found some great ribbon!!! Thank you Black Friday sale at Michael's Craft Store. Here's what I decided on:

There she is! ALL FINISHED!  

Specific questions about this project? Let me know!