Showing posts with label ribbon. Show all posts

February 26, 2012

Birdseed Cupcakes


It's for the birds.. literally. Super simple birdseed cupcakes, complete with ribbon hanger. (And the birds can use the ribbon for their nests--it's a fact)

*Update: once my cupcakes dried, they didn't stay together quite as well as I'd wanted (especially since my original plan was to make a birdseed wreath)..I think overall the cupcakes should be fine, but I think adding the ingredients below (bolded) will work better for the wreath at least.

Here's what you'll need:


4 cups Birdseed
1 packet Knox unflavored gelatin
3 tablespoons light corn syrup
3/4 cup all-purpose flour
warm water
cupcake tray
Cooking spray
thin ribbon
Scissors

Estimate the length of ribbon you'll need. Tie the ends in a knot. You'll need one for each cupcake. Approximately 24.
Pour packet of gelatin into a bowl. Add 1/2 cup warm water and stir until dissolved. Stir in corn syrup and flour.

Add 4 cups of birdseed and stir. Mixture will get stickier as you continue to stir.
Spoon into greased  cupcake tray. Use a knife to wedge the ribbon deep into each cupcake. Add additional seed and press firmly.


Allow to sit until dry.

When ready, they should slide out of the tray with ease.

Hang in your trees and enjoy the visitors! So cute and the birds will love them too!


*Update: wreath to come.. hopefully it will work this time. Stay tuned!


Finally-- SUCCESS! the new recipe (above) is wayyyy better than the first, it's like super glue! (I hope these aren't famous last words) When I read about doing this, it suggested using a decorative bundt cake pan and I have to say, the examples I saw were quite pretty. BUT, I don't have a bundt pan or anything decorative for that matter, so I turned to a disposable round foil pan instead.

To create the hole, I used a drinking glass turned it upside down. Be sure to grease both the pan and the edge of the glass.


Scoop your mixture in and press firmly- really give it a good smush!


Keep smushing!


Let it sit overnight. It may look a little white and it should slide right out of the pan.


Add a fancy bow! I used unwired polka dot ribbon with the wired green sheer ribbon. It really dresses it up and makes it a great gift option.


I LOVE the sunflower- it makes it so pretty and springy!


Much better than the first crumbled attempt! Hopefully it can also withstand some wind!


February 21, 2012

Spring Wreaths in February

Okay, okay, so it's possible I'm getting ahead of myself with this whole "spring is coming" thing.. but seriously, I'm tired of the cold, and we've only gotten one snow delay once this entire winter.

And in the words of Lauryn Hill, "after winter must come spring".. in my mind (my super planner, Type A mind) I'm totally justified in getting ready early.

I may also be over eager since I made something like 4 winter wreaths (Check them out here and here)..none of which for me, so my door had an autumn leaf wreath on it from October until a few weeks ago.

The two wreaths below are very similar, yet customized for exactly what you like.


I love the idea of putting your house number on your wreath, it's so cute and practical. the flowers are both hot glued and wired in. I pulled the leaves off the flower stems and hot glued them separately.


Ribbon wrapped house numbers- as easy as it sounds. All you need are the simple wooden letters from your local craft store (I think these were $2.99 each at Hobby Lobby?) Start on one end and hot glue your ribbon to the back. wrap several times, then glue again. Keep going until you've wrapped the entire thing. Hot glue the end.


Here's a closer look:


Since I don't have a house number, only a letter, I didn't want to go that route for my own wreath. Instead I got the long vine-like stems (also from Hobby Lobby) and inserted them in to the wreath, starting each at a different point.I pulled leaves off the flower stems and added them to make it look more full.


Consider this:

Why wood wreath forms are great-
1. they're generally cheaper than Styrofoam wreath forms ($4.99 compared to $12ish)
2. It's easier to make your stems stay put!
3. It gives a more natural looking final product


December 4, 2011

DIY No-Sew Pacifier Clips

At an age when I feel like everyone I know is either getting married or having a baby, I try to get creative with gift giving. Here's a sure fire craft project that will give your baby gift a personal touch!

DIY No-Sew Pacificer Clips


What you'll need:
Ribbon (1 inch wide), Zelcro roll (self-stick back if desired, 1 inch thick), Hot glue,
 Suspender/Pacifier/Mitten clips, Scissors


Trim your ribbon to the desired length. Keep in mind you'll be folding it over.


Turn your ribbon over, and fold the end under. Hot glue it down. Do this to both sides.


Cut a small square of velcro, peel back the adhesive paper, and add hot glue. Apply one part of the velcro to the ribbon, slightly overlapping the end you tucked/glued.

This is your "pacifier side". Add the matching piece of velcro farther down on the ribbon, allowing enough distance that you could string the ribbon through the pacifier and still velcro it closed. (these instructions are confusing so see pictures below for help!)


Here's a side view to help you judge how much space to leave between velcro pieces.


You'll do these same steps to attach velcro on the opposite end of the ribbon. Since this is your metal clip side, you won't need to space the two pieces of velcro apart as much.

pacifier Clip

Add your clip.


Done!

Here's a basket I created for Baby Maddox, and incorporated the clips!


Let me know if you have any questions!


December 1, 2011

November Wrap Up!

I'm starting to decorate, shop, wrap, cook, and prepare for the holidays! Make sure you sign up to follow LibbyRibbons so you can keep up with all the creative happenings of the season! In the meantime, here's what I wrapped up in November..


My sister Courtney turned 26 this month, so I sent this to Virginia for her.
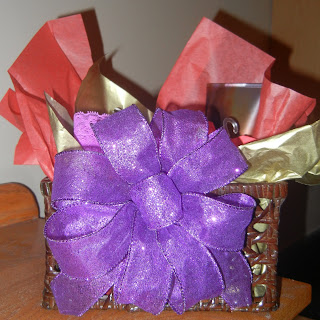
She asked for Twilight Woods lotion from Bath & Body Works, so I based the gift basket off the colors of the bottle, and added a BIG PURPLE BOW-- of course! 


 A peak inside: Twilight Woods body wash & lotion, shower puff, aloe filled socks, travel hand sanitizers in yummy scents, some purple undies, and a $10 gift card to Victoria's Secret


 I bought this ribbon months ago in anticipation for my good friend Angie's birthday. This girl can't get enough animal print So.. when her birthday finally got here, I was so thrilled to top her champagne bottle with a massively obnoxious leopard print bow!


LOVE THIS RIBBON! 
 (added gold curly pieces for a little texture)


Happy Birthday Court & Angie! Love, love, love you!

Ps. If you'd like to learn to make a bow, stay tuned, I'll post a How-To soon!

November 13, 2011

Paper Bow Wine Topper

Perfect for either a casual occasion or for a more festive event, paper bows are easy to make and look pretty awesome!
 (if I do say so myself!)

A total coincidence that the colors of the label matched the autumn paper I'd previously picked out, but it's not a bad idea, if you're flexible about paper..or wine.


Here's what you'll need:
2 colors/patterns 12x12'' scrapbook paper - scissors- glue - 1 pipe cleaner - ribbon (with wire)


Here's How..


1. Cut each piece of scrap booking paper into strips.(about 7).
2. Roll the paper, one at a time, around your finger to create a slight curl. Tuck end and glue.
3. Continue paper around and glue again, and again until you glue the end down.
4. Once dry, pinch the end of each paper circle to create a pedal shape.
5. Complete rolling, gluing, and pinching several paper circles.
6 &7. String them each onto a pipe cleaner, alternating colors/patterns.
8. Push them close together and twist the pipe cleaner closed. Some overlapping of the paper is good.
9. Cut a piece of ribbon and tie it around the bottle's neck. Lace one side of the ribbon end through the pipe cleaner keyhole and tie the ribbon ends together again to secure. Pull ribbon end through the center, only part way and shape as center of "flower". Twist and turn the pipe cleaner and shape it as you like it. Add extra strands of ribbon and curl them using a pencil, etc.


  Cute, huh?